Want to make your own hopscotch mat? They're great for playing indoors on cold or rainy days, are machine washable, and roll up for easy storage. (Thanks to my friend Bethany for the idea!)

Materials:
12" x 14" pieces of fabric:
- x 10 cotton print
- x 10 white muslin
85" x 36" medium or heavy weight fabric for the mat (I used an old curtain panel)
Twill tape, ribbon, or bias tape
Scissors
Iron
Disappearing marking pen or chalk
Fusible webbing/tape
Fabric turner
Fiber-Lok Non-Skid Rug Backing
Cardboard toilet paper roll
Paint brush

Instructions:
Fold the long sides of the mat fabric over 3/4" and press. Fold another 3/4" and press again. Sew along inner edges. Repeat for one short side of the fabric. Before hemming the second short side, tuck the twill tape under the hem, 5 1/2" in from the long side of the mat. Make sure one piece of twill tape is pulled away from the fabric. Sew along inner edge of hem, then sew along outer edge of hem where the twill tape is pulled away from the fabric.


Pin together each 12" x 14" cotton print to a 12" x 14" piece of muslin, right sides together. Sew around the edges with a 1/2" seam allowance. Do not leave an opening.

Clip the corners and cut a 4" slit in the muslin, 3" in and parallel to the long side of the rectangle. Turn right side out by pulling the printed fabric through the slit. Push out corners with a fabric turner. Press.

Print numbers and cut out. I used Myriad Pro font, size 400, or you can download the number template here. Trace the numbers onto the fronts of each rectangle using chalk or a disappearing marking pen.


Using a zig-zag stitch, stitch around the outline of the number. I used the following sewing machine settings:
Tension: 3
Length: 0.4
Width: 3.0
Cut away the printed fabric inside the number, being careful not to cut through the muslin.

Pin the rectangles onto the mat then secure with fusible webbing. This will keep them in place while sewing. Sew rectangles onto mat.

If you like, you can use scraps of fabric to create a small bean bag and pocket to store it in. The pocket closes with velcro and the bean bag is filled with rice.

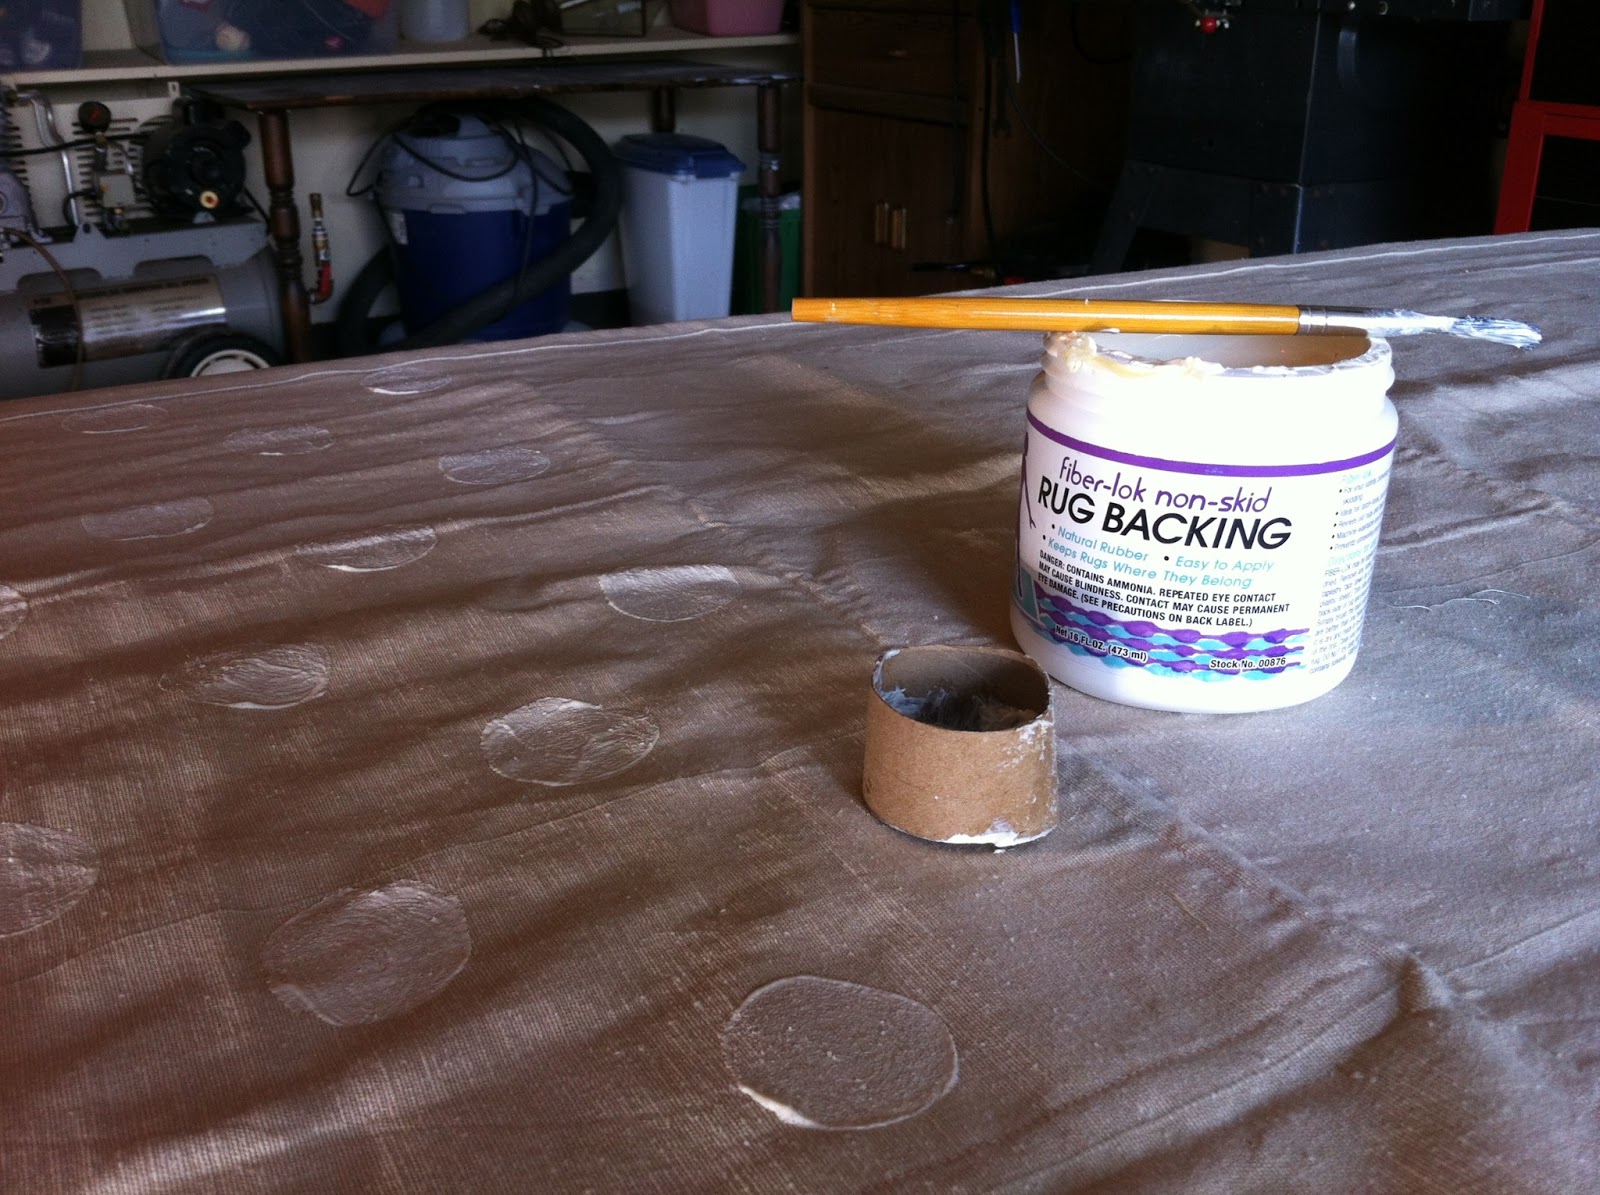
The last step is to add non-slip rug backing to the mat. Cut off the end of a toilet paper roll to create a round stencil. Using the toilet paper roll stencil, paint the rug backing onto the back of the mat in a polka-dot pattern. (Use in a well ventilated area because it has a pretty strong smell.) Let dry overnight.

The finished hopscotch mat:
 |
| Front |
 |
| Front |
 |
| Back |
 |
| Roll up and tie with twill tape to store |


